Setting Up Selenium Scripts
Selenium is a tool that record's browser actions and responses used predominantly by testing and automation teams. AppSpider can execute Selenium scripts at runtime. This means that new session cookies are generated. If proxy file recordings of Selenium script executions are used, the cookies can be old and the web scanner will not be logged in unless the Selenium scripts are rerun and rerecorded.
It allows them to:
- Build a comprehensive testing suite that ensures every aspect of application functionality. If AppSpider uses Selenium, the entire site will be tested.
- Get testing done earlier and faster.
System Requirements
- AppSpider (6.9 or higher)
- Java Development Kit (1.8 or higher)
- Apache Maven
Browser Requirements
- Mozilla Firefox (33 only)
Building your source code
This document provides an example of a using the Selenium Firefox WebDriver written in Java, and proxying it through AppSpider.
Create a project in Maven to build your Selenium script. Use the Java code from the following link as a guideline: https://github.com/sdavis-r7/selenium-java-firefox-appspider-example/blob/master/src/main/java/com/rapid7/TestFirefoxSelenium.java.
- Assign baseUrl:
private String baseUrl = baseScheme + "://www.mozilla.org/";
- Assign proxyPort:
private String proxyPort = "32768";
- Assign FF_PROFILE (Firefox Profile Name):
private String FF_PROFILE = "RAPID7APPSPIDERSELENIUM";
- Configure Selenium WebDriver to use Firefox:
ProfilesIni listProfiles = new ProfilesIni();
FirefoxProfile profile = listProfiles.getProfile( FF_PROFILE );
objDesiredCapabilities.setCapability(FirefoxDriver.PROFILE,profile);
driver = new FirefoxDriver(objDesiredCapabilities);
- Configure Selenium to run through AppSpider proxy:
Proxy objProxy = new Proxy();
objProxy.setHttpProxy(proxyUrl+":"+proxyPort);
objProxy.setSslProxy(proxyUrl+":"+proxyPort);
objDesiredCapabilities.setCapability(CapabilityType.PROXY, objProxy);
- Run the Maven package and build the Selenium .jar file:
mvn package
Exporting the AppSpider proxy certificate
This task must be performed on the AppSpider machine intended to run the script.
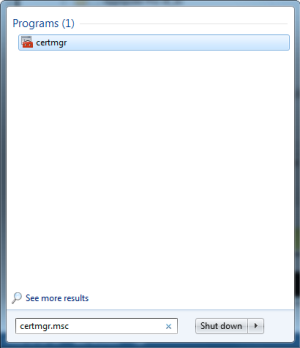
- In Windows, click the Start button.
- Type certmgr.msc into the search box and press ENTER.
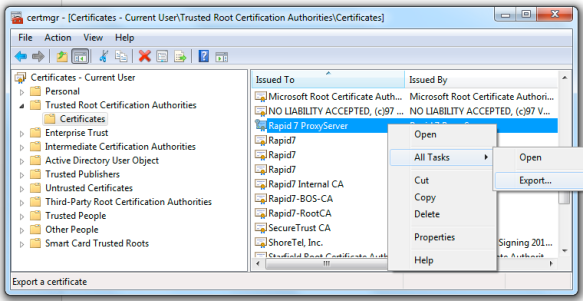
- Navigate to Trusted Root Certification Authorities -> Certificates.
- Locate and right-click the Rapid7 ProxyServer certificate.
- Navigate to All Tasks -> Export to open the certificate Export Wizard.
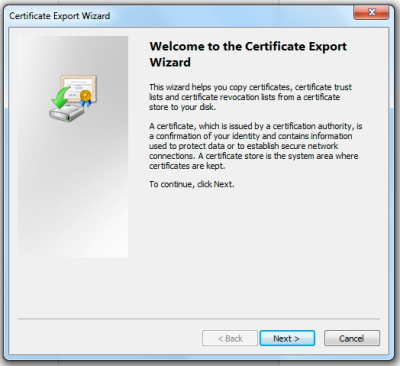
- Click the Next button to begin.
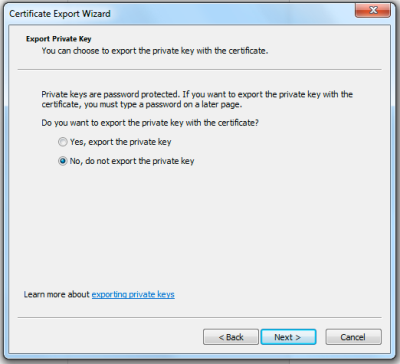
- Select No, do not export the private key and click the Next button.
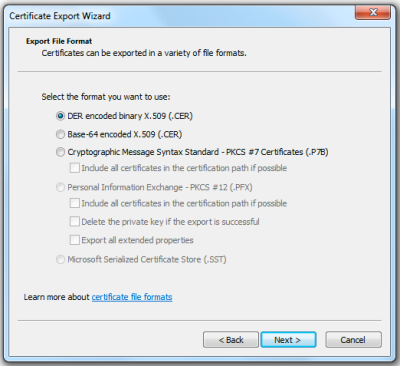
- Select DER encoded binary X.509 (.CER) and click the Next button.
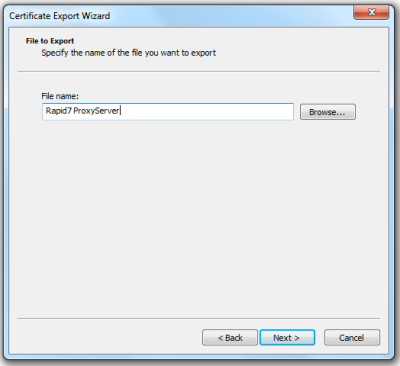
- Name the file Rapid7 ProxyServer and click the Next button.
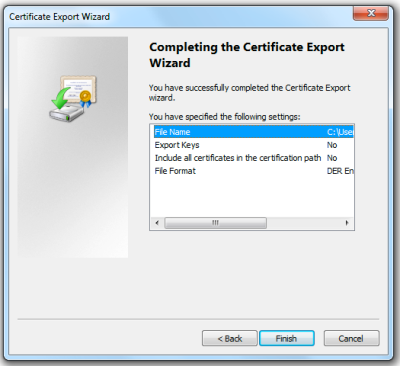
- Click the Finish button to complete the Certificate Export Wizard.
Creating a Firefox profile
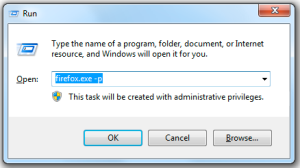
- Hold the Windows Key + R to open the Run dialog box.
- Type firefox.exe -p into the Run dialog box and click the OK button.
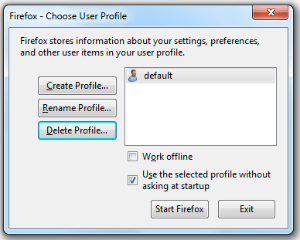
- Click the Create Profile button.
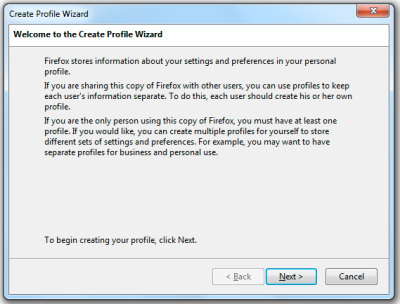
- Click the Next button to create a Firefox profile.
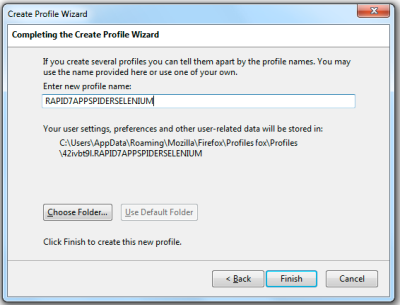
- Enter RAPID7APPSPIDERSELENIUM as the profile name and click the Finish button.
- Select RAPID7APPSPIDERSELENIUM and click the Start Firefox button.

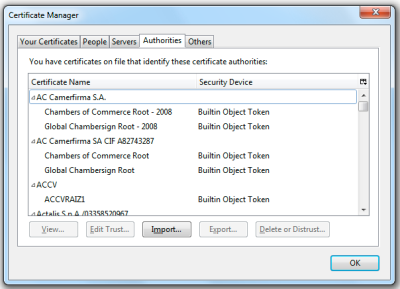
Importing the Trusted Root Certificate
- Navigate to Firefox Options -> Advanced -> Certificates -> View Certificates.

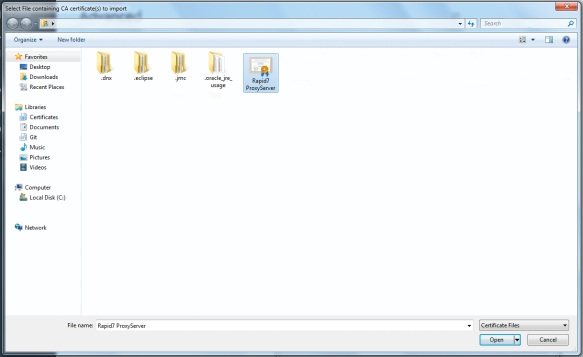
- Select the Authorities tab and click the Import button.
- Select the certificate file named Rapid7 ProxyServer and click the Open button.
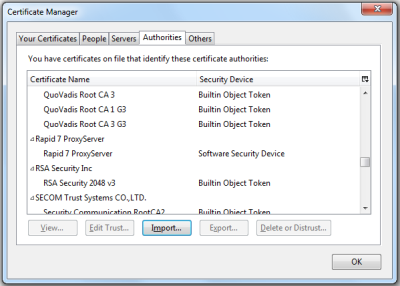
- Click the OK button to exit the Certificate Manager.
Editing the scan configuration in AppSpider
- Open AppSpider.
- Locate the scan configuration and select Edit Configuration.
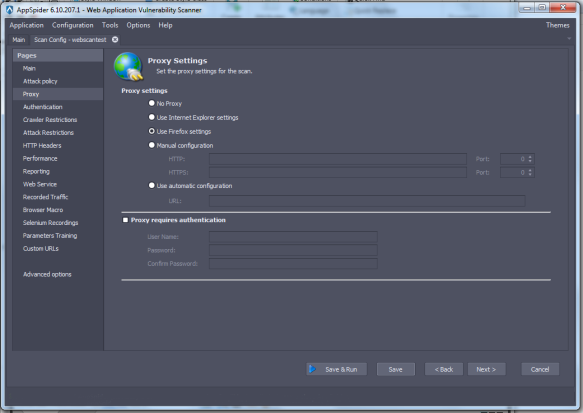
- Select Proxy from the Pages menu.
- Select Use Firefox settings.
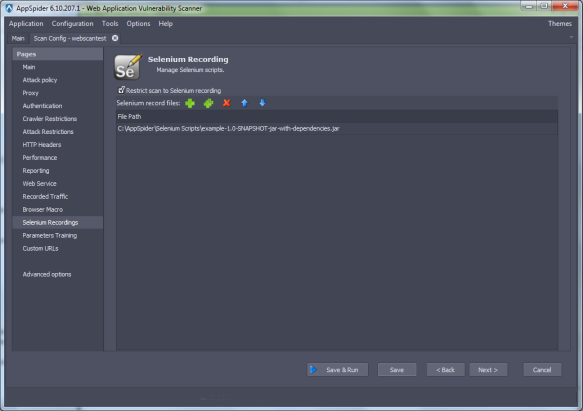
- Select Selenium Recordings from the Pages menu.
- Click the Add File (+) icon, highlight the bundled Selenium .jar file, and click the Open button.
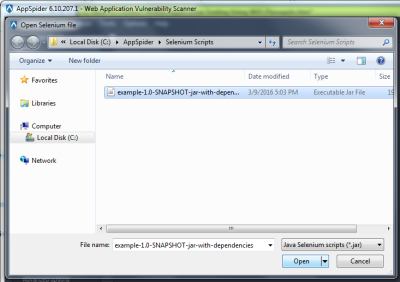
The .jar file is now visible in AppSpider.
- Select the Restrict scan to Selenium recording check box to limit the scan to the Selenium script.
- Click the Save & Run button to start the scan in AppSpider.