Webhook alerts
Unlike email or phone notifications, Webhooks are ideal for automated reactions on triggered alerts. The Webhook Alert is sent as an HTTP POST command with a JSON-encoded parameter payload. The content type of the message is encoded in application/x-www-form-urlencoded.
Payload
The payload contains information about the triggered Alert, host and log where the alert has been triggered together with the triggering event and event context. The payload has the following structure:
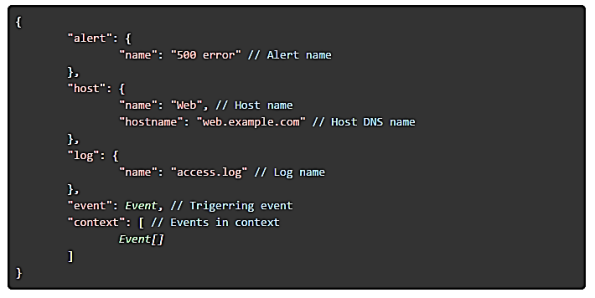
The Where Event contains basic information about the event. It has the following structure:

Simple testing
You can use publicly available POST bins such as RequestBin. Create a new bin and add the URL generated as target PORT URL.
Make sure you do not reach the alert limitation (per hour and per day). It is a common pitfall.
Authentication
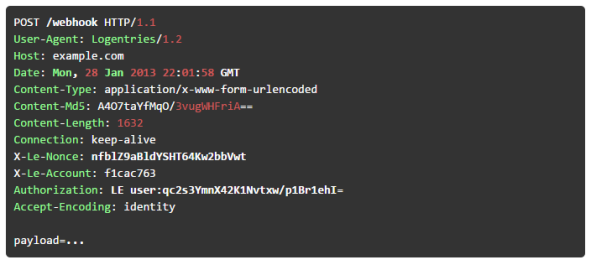
In order to authorize the Webhook, specify a username and password in the Webhook URL, for example http://user:password@example.com/webhook. The password is a shared secret which is used for authentication. The username is sent in plain text as a part of the Authorization header. All HTTP POSTs are authorized using the HMAC. The HMAC hash is stored in the Authorization header as displayed in the following example (important header fields are highlighted):
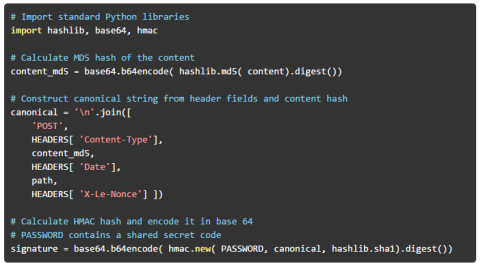
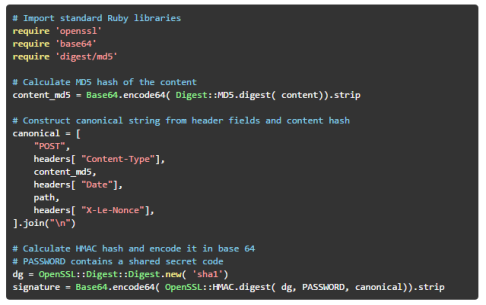
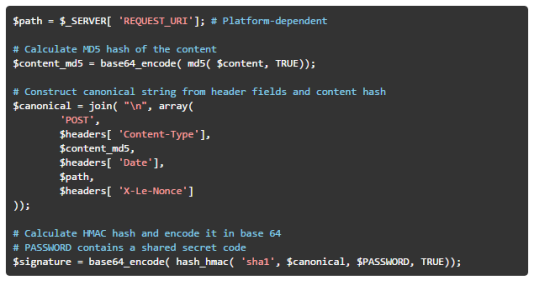
The hash function is calculated from a canonical string. The canonical string is a concatenation of the method type (POST), content type, MD5 hash of the message content, the date header, path, and nonce stored in the X-Le-Nonce header. Assuming header fields are stored in the HEADERS dictionary, path contains the path section of the request, and PASSWORD contains the shared secret code. The HMAC calculation can be implemented in the following way:
Ruby
PHP
Apart from username and the signature, make sure that the timestamp is reasonably recent and that nonce hasn’t been sent yet (to avoid reply attacks).