
An asset is a single device on a network that the application discovers during a scan. In order to create a site you must assign assets to it.
Note: If you created the site through the integration with VMware NSX, you cannot edit assets, which are dynamically added as part of the integration process. See Integrating NSX network virtualization with scans.
Click the Assets tab in the Site Configuration.
You can either manually input your assets or asset groups, or specify a connection that discovers assets.
Note: Switching between Name/Address and Connections methods will delete any unsaved assets that have been included for scanning. Also, refreshing your browser will remove unsaved assets.
Note: After you save a site, you cannot change the method for specifying assets. For example, if you specify assets with a discovery connection and then save the site, you can not manually add IP addresses or host names afterward.
Use this method to create a site that scans a manually specified collection of assets or asset groups. Such sites work best for scanning environments that have non-virtual assets and do not often change. You can specify individual assets, ranges, asset groups, or a mixture.
Use this method to specify individual assets or ranges of assets. You can use only this method, or also add asset groups to the same site.
To add assets:
Use any of the following notations Each target can be separated by either typing a comma or Enter after each asset or range:
IPv6 addresses can be fully compressed, partially uncompressed, or uncompressed. The following are equivalent:
If you use CIDR notation for IPv4 addresses (x.x.x.x/24) the Network Identifier (.0) and Network Broadcast Address (.255) will be ignored, and the entire network is scanned.
You also can import a comma- or new-line-delimited ASCII-text file that lists IP address and host names of assets you want to scan by clicking Choose File or Browse, depending or your browser.
Specifying assets by names or IP addresses
If you don't want to scan certain assets, enter their names or addresses in the Exclude pane. You may, for example, want to avoid scanning a specific asset within an IP address range either because it is unnecessary to scan, as with a printer, or it may require a different template or scan window than other assets in the range. The same format notations apply.
Tip: For a list of your assets that you can copy to your clipboard, click  next to the Browse button.
Use this method to scan one or more asset groups that you have previously created based on logical groupings. You can also combine the asset groups with individually specified assets or a range, as described above. You can either scan all the assets with the same Scan Engine or pool, or scan them each with the Scan Engine that was most recently used to scan the asset. To learn more, see Determining how to scan each asset when scanning asset groups.
To add asset groups:
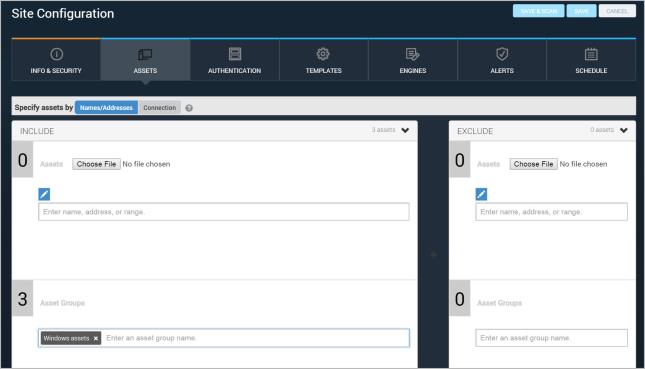
Adding an asset group to a site
If you don't want to scan certain assets, enter their names or addresses in the Exclude pane. You may, for example, want to avoid scanning a specific asset within an IP address range either because it is unnecessary to scan, as with a printer, or it may require a different template or scan window than other assets in the range. The same format notations apply.
Use this method to create a site in which the Security Console discovers assets via a connection with a server that manages those assets. Asset membership in a site created this way is subject to change under any of the following conditions:
Such sites are ideal for scanning Amazon Web Services (AWS) and virtual assets managed by VMware vCenter or ESX/ESXi. Asset membership in a site is subject to change if the discovery connection changes or if filter criteria for asset discovery change.
For information on different types of discovery connections and best practices see Managing dynamic discovery of assets.