Your organization may distribute Scan Engines in various locations within your network, separate from your Security Console.Unlike the local Scan Engine, which is installed with the Security Console, you need to separately configure distributed engines and pair then with the console, as explained in this section.
Configuring a distributed Scan Engine involves the following steps:
By default, the Security Console initiates a TCP connection to Scan Engines over port 40814. If a distributed Scan Engine is behind a firewall, make sure that port 40814 is open on the firewall to allow communication between the Security Console and Scan Engine.
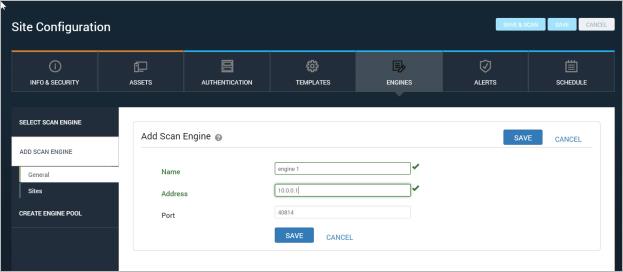
The first step for integrating the Security Console and the new Scan Engine is adding information about the Scan Engine.
You can add a Scan Engine while you're configuring a site:
If you are adding an engine while configuring a new site, click the Create site button on the Home page.
If you are adding a new engine option to an existing site, click that site's Edit icon in the Sites table on the Home page.
Adding a Scan Engine
After you add the engine, the Security Console creates the consoles.xml file. You will need to edit this file in the pairing process.
If you are a Global Administrator, you also have the option to add an engine through the Administration tab:
After you add the engine, the Security Console creates the consoles.xml file. You will need to edit this file in the pairing process.
Note: You must log on to the operating system of the Scan Engine as a user with administrative permissions before performing the next steps.
Edit the consoles.xml file in the following step to pair the Scan Engine with the Security Console.
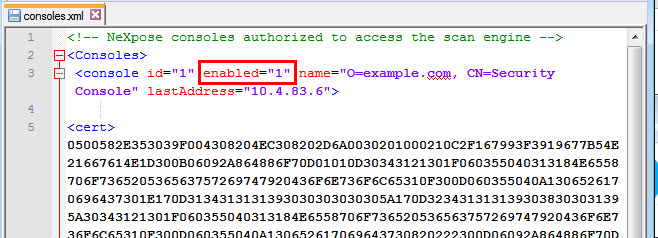
The Scan Engine's consoles.xml file showing that the Security Console is enabled
Verify that the console and engine are now paired:
Note that the status for the engine is Unknown.
The Status column indicates with a color-coded arrow whether the Security Console or a Scan Engine is initiating communication in each pairing. The color of the arrow indicates the status of the communication. A green arrow indicates Active status, which means you can now assign a site to this Scan Engine and run a scan with it.
For more information on communication status, see Managing the Security Console in the InsightVM Administrator's Guide. Changing Scan Engine communication direction in the Console
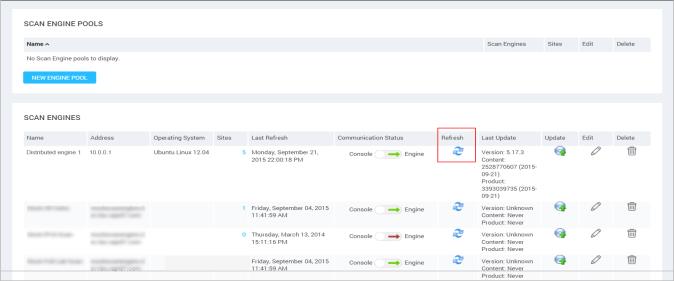
The Scan Engines table with the Refresh icon and Active status highlighted
Note: If you change the address of the Scan Engine, you will have to pair it with the Security Console again.
On the Scan Engines page, you can also perform the following tasks:
You can configure certain performance settings for all Scan Engines on the Scan Engines page of the Security Console configuration panel. For more information, see Changing default Scan Engine settings.
Note: If you have not yet set up a site, create one first. See Creating and editing sites.
If you are assigning a site to an engine while configuring it, see Selecting a Scan Engine or engine pool for a site.
If you are assigning a site via the Administration tab:
The console displays a box listing all the sites in your network.
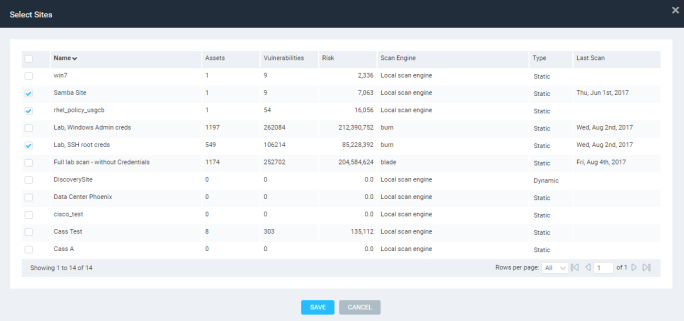
Assigning a site to a Scan Engine
The sites appear on the Sites page of the Scan Engine Configuration panel.