Ticketing Integration for Remediation Workflow Projects
Remediation Projects integrate with popular ticketing systems so that security teams can automate the creation and assignment of work items based on pre-configured rules.
Why integrate Projects with Ticketing?
Many security teams today manage remediation efforts by generating CSV or PDF reports spanning hundreds of pages, and spend a lot of time breaking down exposures into actionable work items. The Automated Ticketing feature simplifies this process while providing the following advantages:
- Targeted and precise tickets are created automatically with assignment rules that can be reused across projects.
- You can customize ticketing templates to include as much security context as you see fit.
- The Projects tab provides a central location for management and tracking of your remediation projects.
- Solution statuses in Projects are updated from the ticketing system, so you always have a clear picture of the progress of remediation work.
- Remediation teams can continue to use their existing tools and processes.
JIRA integration requirements
The integration with JIRA currently requires the URL of a JIRA server that accepts inbound communication from the Rapid7 Insight Platform, and an account with the following permissions:
- Browse projects
- View read only workflow
- Assignable user
- Create issues
- Assign issues
- Edit issues
- Close issues
- Delete issues
- Modify reporter
- Set issue security
- Add comments
The above minimum permissions will allow you to create a connection, but you must be aware of other fields required to create a ticket. If the account does not have access to a required field you may not be able to save field mappings correctly.
Creating and Managing JIRA ticketing in Remediation Workflow
- Open the Management tab of your cloud console. You will see the Manage Elements header and a dropdown beside it. Click on the dropdown and select Manage Ticketing Connection.

It is also possible to get to this page from the Projects tab by clicking the Create Ticketing Connection (if you have not created a connection) or the Manage Ticketing Connection button.
- Select the JIRA ticketing option and enter the URL of your JIRA server and the credentials to an account with the required permissions.
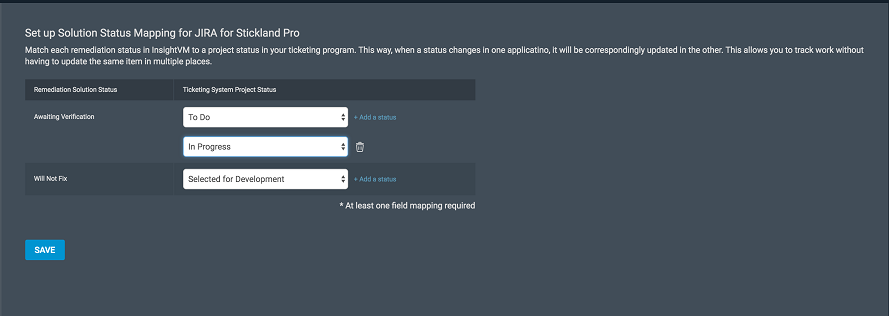
- The Solution Status mapping step allows you to map one or more JIRA issues statuses to a Remediation Project status. The statuses are:
-
Awaiting Verification - This state signifies that the remediator has taken action to mitigate the vulnerability and is now awaiting verification, that the vulnerability no longer exists, or that the remediation failed.
-
Will Not Fix - This state signifies that the item cannot be remediated.
While changing the status of a JIRA ticket can change the status of a remediation solution, changing the solution status will not change a JIRA ticket's status. The integration will add a comment to the ticket to notify the ticket owner of the updated state.
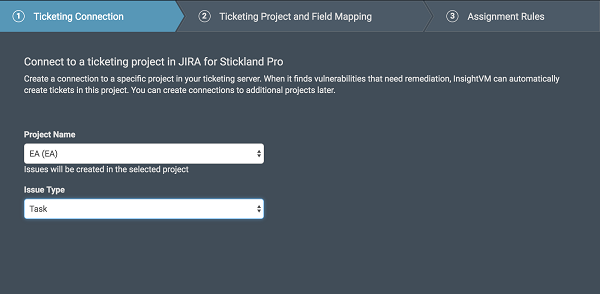
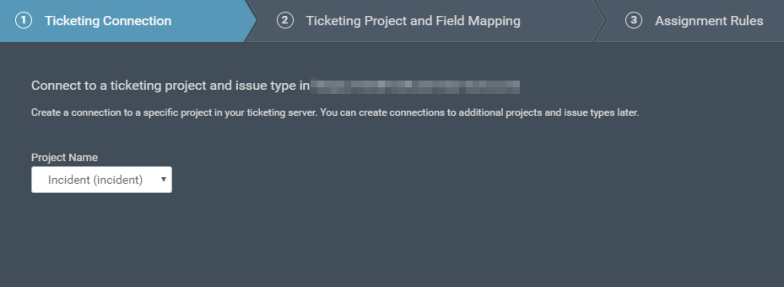
- Click Save and proceed to configure a ticketing template for your project. The ticketing template wizard has three steps.
In the first step, you select the JIRA project for automated ticketing, and the type of work item that will be created, e.g. Task.
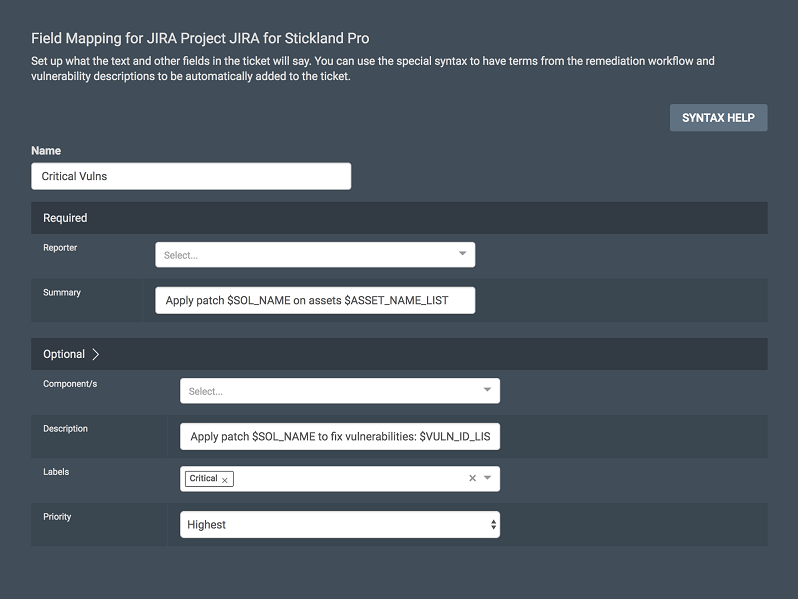
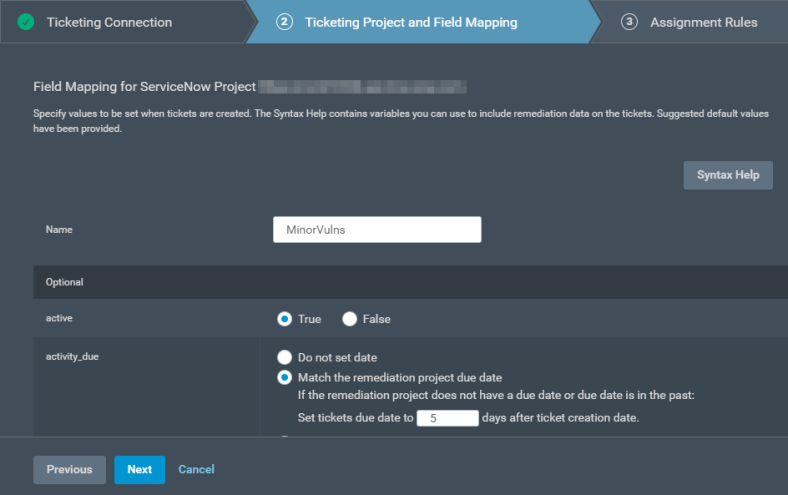
In the next step, you can draft a template of the ticket that will be generated from your Remediation Project. In this screen, you can configure how concise or detailed you would like the ticket summary and description to be. You can use variables for information like solution name ($SOL_NAME), asset list ($ASSET_NAME_LIST), and other data related to your vulnerability scans. The Syntax Help button opens a dictionary that lists all the supported placeholders.
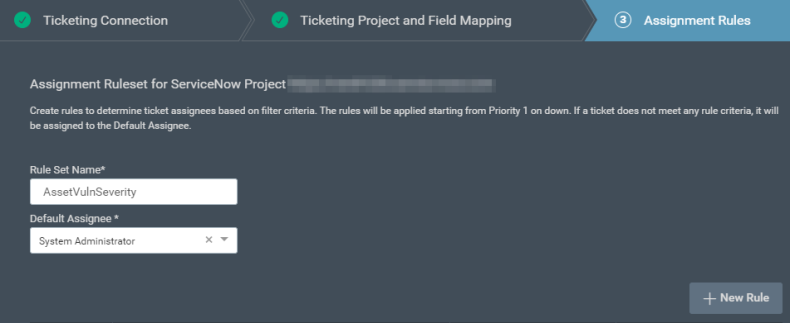
In the final step, you can create rules for assigning automatically generated tickets to your team members based on factors like the ownership of assets and expertise of the assignees. The list of rules is set up in order of preference, and every ticket is assigned based on the first rule whose asset filter conditions are satisfied. If no rule is matched, the ticket gets assigned to the Default Assignee. Click on the  button to create a new assignment rule.
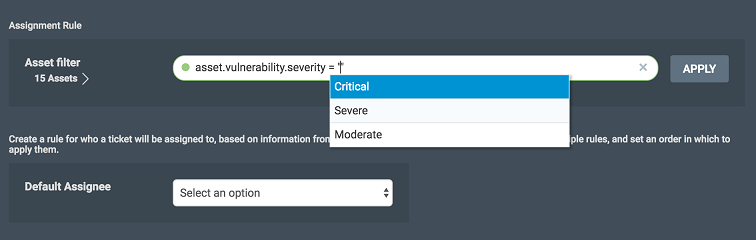
When you have created all the necessary rules, click Save and exit from the ticketing wizard.
ServiceNow integration requirements
The integration with ServiceNow currently requires the URL of a ServiceNow server that accepts inbound communication from the Rapid7 Insight Platform, and an account with the following permissions:
OR
- itil_admin
- itil
- mid_server
The above minimum permissions will allow you to create a connection, but you must be aware of other fields required to create a ticket. If the account does not have access to a required field you may not be able to save field mappings correctly.
Creating and Managing ServiceNow ticketing in Remediation Workflow
Note: ServiceNow integration does not require the ServiceNow Vulnerability Response module.
- Open the Management tab of your cloud console. You will see the Manage Elements header and a dropdown beside it. Click on the dropdown and select Manage Ticketing Connection.
It is also possible to get to this page from the Projects tab by clicking the Create Ticketing Connection (if you have not created a connection) or the Manage Ticketing Connection button.
- Select the ServiceNow ticketing option and enter the URL of your ServiceNow server and the credentials to an account with the required permissions.
- The Solution Status mapping step allows you to map one or more ServiceNow issues statuses to a Remediation Project status. The statuses are:
-
Awaiting Verification - This state signifies that the remediator has taken action to mitigate the vulnerability and is now awaiting verification, that the vulnerability no longer exists, or that the remediation failed.
-
Will Not Fix - This state signifies that the item cannot be remediated.
While changing the status of a ServiceNow ticket can change the status of a remediation solution, changing the solution status will not change a ServiceNow ticket's status. The integration will add a comment to the ticket to notify the ticket owner of the updated state.
- Click Save and proceed to configure a ticketing template for your project. The ticketing template wizard has three steps.
In the first step, you select the ServiceNow project for automated ticketing, and the type of work item that will be created, e.g. Task.
In the next step, you can draft a template of the ticket that will be generated from your Remediation Project. In this screen, you can configure how concise or detailed you would like the ticket summary and description to be. You can use variables for information like solution name ($SOL_NAME), asset list ($ASSET_NAME_LIST), and other data related to your vulnerability scans. The Syntax Help button opens a dictionary that lists all the supported placeholders.
In the final step, you can create rules for assigning automatically generated tickets to your team members based on factors like the ownership of assets and expertise of the assignees. The list of rules is set up in order of preference, and every ticket is assigned based on the first rule whose asset filter conditions are satisfied. If no rule is matched, the incident gets assigned to the Default Assignee. Click on the button to create a new assignment rule.
When you have created all the necessary rules, click Save and exit from the ticketing wizard.
Enabling Automated Ticketing for Remediation Projects
The Projects tab shows the list of Remediation Projects you have set up for your environment. If a project has automated ticketing enabled, the Ticketing column will show the  icon.
icon.
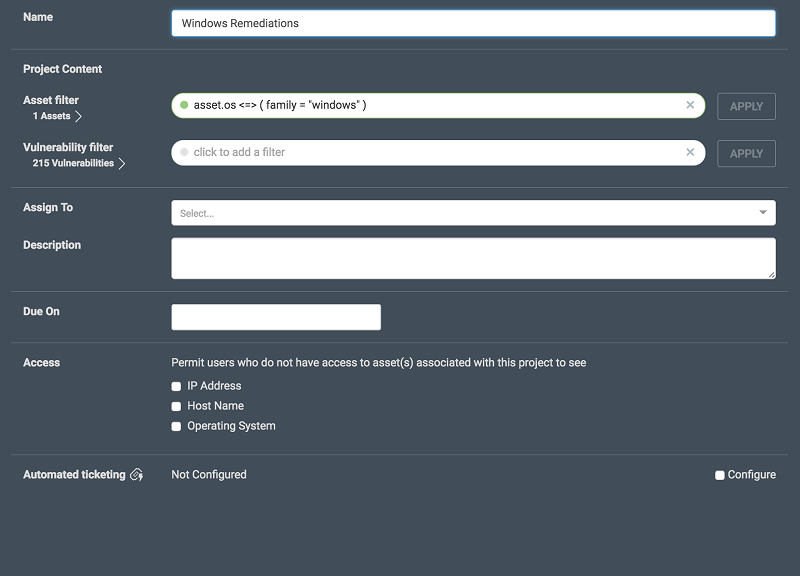
If you wish to enable automated ticketing on a project, you must go to the Edit Project screen and click on the Configure checkbox near the bottom of the page. This will reveal a list of ticketing templates that you have already configured, and you can select one for your project.
You can disable the ticketing configuration at any time. No new tickets will be generated for the Remediation Workflow project while the ticketing connection is disabled. You can also re-enable the ticketing connection later.