Database backup/restore and data retention
Running regularly scheduled backup and restore routines ensures full recovery of the Security Console in the event of hardware failure. The application performs actual backup and restore procedures in maintenance mode. It cannot run these procedures while scans are in progress. See
Running in maintenance mode. However, you set up backup and restore operations while the application is in normal mode.
Important notes on backup and restore
There are four possible options on the backup/restore page:
- Backup data onto the application’s file system.
- Restore an installation from a prior backup already on the application’s file system.
- Copy an existing backup to external media using Browse.
Note: You should copy backup data to external storage media to prevent loss in the event of a hardware failure.
- Restore an installation from a prior backup on external storage.
What is saved and restored
A backup will save the following items:
-
database
-
configuration files (nsc.xml, nse.xml, userdb.xml, and consoles.xml)
-
licenses
-
keystores
-
report images
-
custom report templates
-
custom scan templates
-
generated reports
- custom risk strategies
- custom SCAP data
-
scan logs
Performing a backup
To perform a backup, take the following steps:
- Go to the Maintenance—Backup/Restore page, which you can access from the Maintenance link on the Administration page.
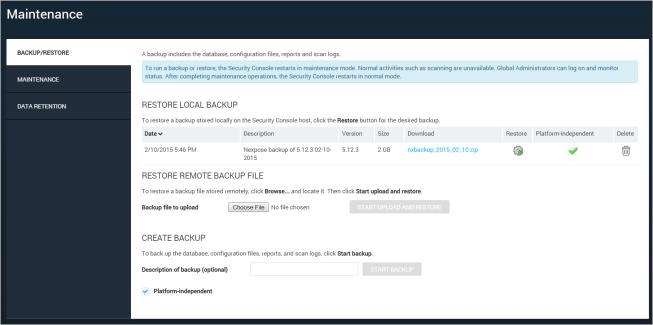
The Backup/Restore page
- In the area titled Create Backup, enter a short description of the new backup for your own reference.
Note: Enabling the platform-independent option significantly increases backup time.
- If you want to do a platform-independent backup, select the appropriately labeled check box. This option is useful for restoring on a different host than that of the backup. It allows you to restore backup files on any host with any supported operating system. This option also reduces the size of the backup files.
- Click Start backup.
The Security Console restarts in Maintenance Mode and runs the backup. In Maintenance Mode, normal operations, such as scanning, are not available. If you’re a Global Administrator, you can log on to monitor the backup process. You will see a page that lists each backup activity.
The Security Console automatically restarts when the backup completes successfully.
Note: If the backup is unsuccessful for any reason or if the Security Console does not restart automatically, contact Technical Support.
After you complete a backup and the Security Console restarts, the backup appears in a table on the Maintenance—Backup/Restore page, under the heading Restore Local Backup. If you want to restore the backup on a different host or store the backup in a remote location, download the backup by clicking the link in the Download column.
Scheduling a Backup
You can set up schedules to automatically back up data in your Security Console on a regular basis.
To schedule a backup:
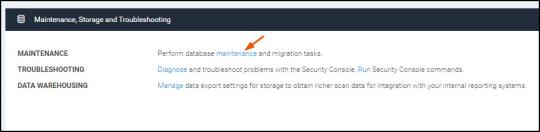
- Select Administration from the left navigation menu.

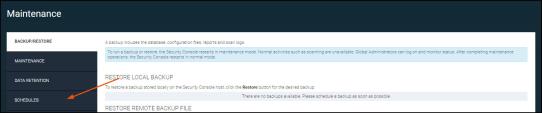
- Under the Maintenance, Storage and Troubleshooting options, click the maintenance link.
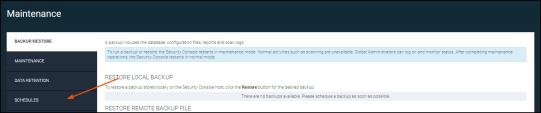
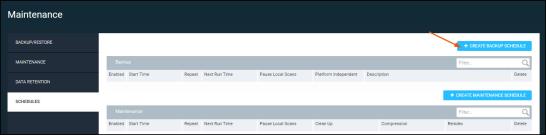
- When the Maintenance page appears, select the Schedules tab.
- Click Create Backup Schedule.
- When the Create Backup Schedule window appears, verify the Enabled option is selected.
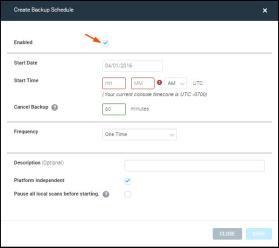
- Enter the following information:
- Start Date — The date you want the schedule to begin.
- Start Time — The time you want the schedule to run at.
- Cancel Backup — The amount of time you want to wait for a backup to start before canceling it. You can enter 0 if you do not want to cancel the backup; the backup will wait until all local scans are complete or paused to run.
- Frequency — The frequency you want to backup your console, such as daily, weekly, or monthly
- Save the schedule.
Disabling a Backup Schedule
To pause or disable a backup schedule:
- Select Administration from the left navigation menu.
- Under the Maintenance, Storage and Troubleshooting options, click the maintenance link.
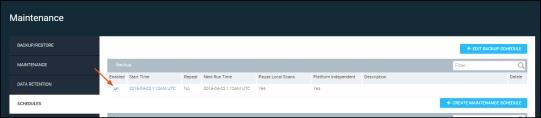
- When the Maintenance page appears, select the Schedules tab.
- When the Schedules page appears, find the backup schedule you want to disable and deselect the Enabled option.
Restoring a backup
The restore procedure reverts the application to its exact state immediately preceding the backup.
To restore a backup:
- Select Administration from the left navigation menu.
- Under the Maintenance, Storage and Troubleshooting options, click the maintenance link.
- Click the Backup/Restore tab.
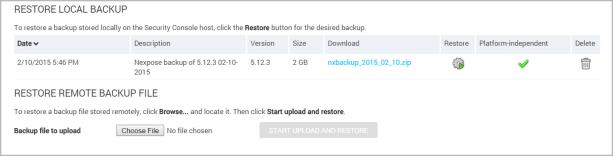
- If you are restoring a backup from a different host, make sure the backup is transferred to the local Security Console host. In the Restore Remote Backup File area, click Choose File to locate and select the backup, and then click Start upload and restore.
- If you are restoring a backup that was stored locally on the Security Console host, in the Restore Local Backup area, locate the desired backup, and then click the Restore icon.
- On the dialog box that appears, click Restore System.
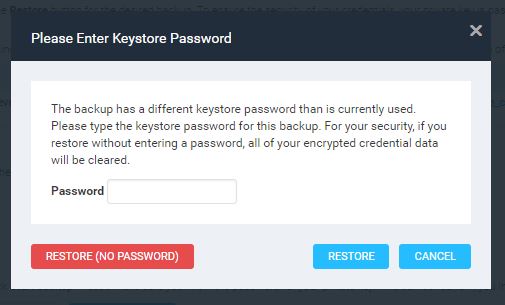
Note: If the current keystore password does not match the backup's password, the Please Enter Keystore Password dialog box appears:
- In the Password field, enter the keystore password for this backup, and then click RESTORE.
- If you do not want to use a password, click RESTORE (NO PASSWORD). For your security, the encryption data that is used for authentication scans will be cleared.
The Security Console restarts in Maintenance Mode and runs the restore procedure. In Maintenance mode, normal operations, such as scanning, are not available. If you are a Global Administrator, you can log on to monitor the backup process page that lists each backup activity. Once the restore begins, it may take some time.
Note: If the backup is unsuccessful for any reason or if the Security Console does not restart automatically, contact Technical Support.
Migrating a backup to a new host
If you are ever required to change the host system for the application, you will have to migrate your backup to the new host. For example, your organization may perform a hardware upgrade. Or the original host system may have failed and is no longer in service. Migrating a backup to a host system other than the one on which the backup occurred is simple and requires a few extra steps:
- Recommended: Apply the latest updates to the old host. See
Managing versions, updates, and licenses.
This step ensures that when you install the application on the new host in step 5, the database structure will be current with that of the latest installer, preventing any compatibility issues that otherwise might occur.
- Do a platform-independent backup, which ensures better integrity for the files when they are restored. See
Performing a backup.
- Go to the backups directory on the host system:
[installation_directory]/nsc/backups. Copy all desired backups, including the one you just completed, to external media. Your organization’s policies may be required you to keep a certain number of backups, such as for PCI audits.
Tip: Do not delete the backup host installation unless it is absolutely necessary. It may be useful for troubleshooting in case you encounter issues running the restored files on the new host.
- Shut down the application on the original host. This is an important step because the application by default checks for updates every six hours. If the update server detects more than one installation with the same serial number, it will block updates.
- Install the application on the new host. For instructions, see the installation guide, which you can download from the Support page in Help.
- Apply any available updates to the installation on the new host.
This step ensures that installation includes any new updates that may have occurred since the backup.
- Manually create the backups directory on the new host:
[installation_directory/nsc/backups.
Note: For this migration process, it is unnecessary to request a product key during installation on the new host. It is also unnecessary to activate the license after you finish the installation and log on to the Web interface.
- Transfer the backup files from the external media to the newly created backup directory.
- In the application, refresh the Administration page in the Web browser.
- Restore the backup(s). See
Restoring a backup.
The application restarts in Maintenance Mode. Normal operations, such as scanning, are not available. If you are a Global Administrator, you can log on to monitor the backup process. You will see a page that lists each backup activity.
The Security Console automatically restarts when the backup completes successfully.
Note: If the backup is unsuccessful for any reason or if the Security Console does not restart automatically, contact Technical Support.
- Verify that all your restored content is available, such as sites and templates.
- IMPORTANT: Contact Technical Support to reset the update history for your license. Since you are transferring your license to a new host, resetting the history will cause the server to re-apply all updates on the new host. This ensures that the update version of the migrated application matches that of the backup on the old host.
Performing database maintenance
You can initiate several maintenance operations to maximize database performance and drive space.
Database maintenance operations can take from a few minutes to a few hours, depending on the size of the database. Once you start these operations, the application shuts down and restarts in Maintenance Mode. Any in-progress scans or reports will stop before completion and any related data will be lost. You will have to rerun any reports or scans after the application completes maintenance operations and restarts in Normal Mode. For more information, see
Running in maintenance mode.
To perform database maintenance:
- Go to the Administration page.
- Click Maintenance.
- Go to the Database Maintenance page and select any of the following options:
- Clean up Database removes leftover data that is associated with deleted objects such as sites, assets, or users.
- Compress Database tables frees up unused table space.
- Reindex Database rebuilds indexes that may have become fragmented or corrupted over time.
- Click Start Database Maintenance.
The Security Console automatically restarts when the maintenance completes successfully.
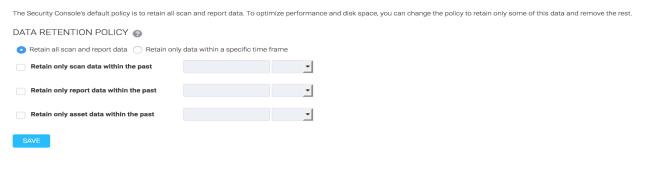
Setting data retention preferences
The Security Console’s default policy is to retain all scan and report data. To optimize performance and disk space, you can change the policy to retain only some of this data and remove the rest.
To enact a partial data retention policy:
- Go to the Administration page.
- Click Maintenance on the Maintenance, Storage and Troubleshooting panel.
- Click Data Retention.
- Select the Retain only data within a specific time frame option.
- Select the time frame of scan, report, and/or asset data to retain. Note: Selecting the asset data retention policy will purge asset data for assets that have not been scanned since the specified time frame. Such assets will no longer be counted towards your license.
- Click Save to enact the policy.
After you enact the policy, the Security Console runs a routine nightly which removes data not included in the retention time frame. The routine begins at 12 a.m. and will not interrupt your normal Security Console operations. If the routine is interrupted, it resumes where it left off on the following evening. The duration of the routine depends on the amount of data being removed.
Note: You cannot stop the routine once it starts, and all data removal is permanent.
Setting a data retention policy