In this section you will learn how to create and configure sites. If you are a new user, you will learn how to create your first basic site. Experienced users can find information on more advanced practices and configurations.
Topics include:
Note: Not all of the procedures described are required for every kind of site. The basic requirements to save a site are a name and at least one asset.
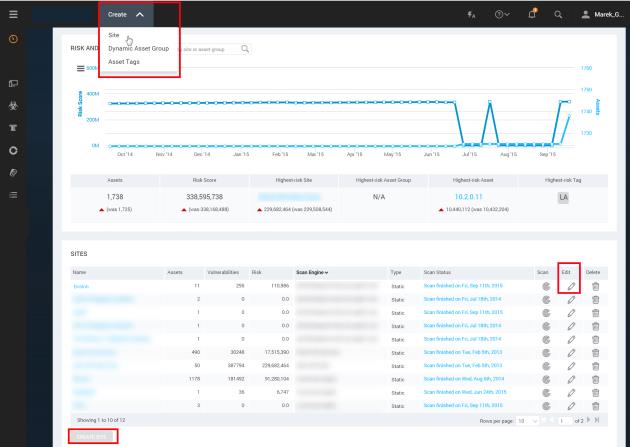
If you want to edit an existing site, click that site's Edit icon in the Sites table on the Home page.
If you want to create a new site, click the Create tab at the top of the page and then select Site from the drop-down list.
OR
Click the Create Site button at the bottom of the Sites table.

Starting to create or edit a site
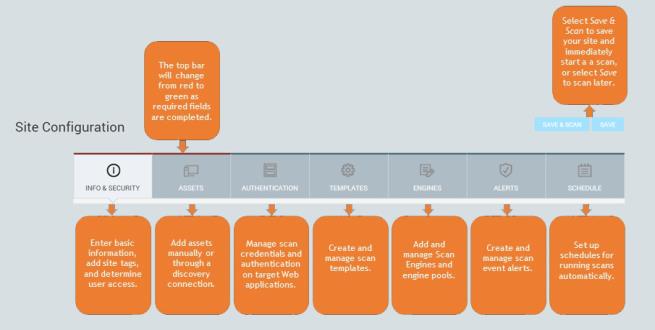
Click the tabs in the Site Configuration to configure various aspects of your site and scans:

The Save & Scan and Save buttons are enabled after you enter the minimum required site information, which includes the site name and at least one asset.
The top of each required tab-Info & Security and Assets-changes from to red to green after you enter as the minimum required information, which includes the name of the site and at least one asset to scan.
Tip: You may want to name your site based on how the assets within that site are grouped. For example, you could name them based on their locations, operating systems, or the types of assets, such as those that need to be audited for compliance.
The importance level corresponds to a risk factor used to calculate a risk index for each site. See Adjusting risk with criticality.
For more information on managing user access, see Giving users access to a site.