This section includes the following topics to help you access and navigate the Security Console Web interface:
If your Security Console is not connected to the Internet, you can find directions on updating and activating on private networks. See Managing versions, updates, and licenses.
The Security Console Web interface supports the following browsers:
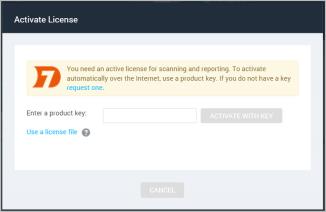
If you received a product key, via e-mail use the following steps to log on. You will enter the product key during this procedure. You can copy the key from the e-mail and paste it into the text box; or you can enter it with or without hyphens. Whether you choose to include or omit hyphens, do so consistently for all four sets of numerals.
If you are a first-time user and have not yet activated your license, you will need the product key that was sent to you to activate your license after you log on.
To log on to the Security Console take the following steps:
If you are running the browser on the same computer as the console, go to the following URL: https://localhost:3780
Indicate HTTPS protocol and to specify port 3780.
If you are running the browser on a separate computer, substitute localhost with the correct host name or IP address.
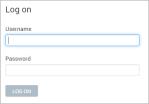
Your browser displays the Logon window.
Tip: If there is a usage conflict for port 3780, you can specify another available port in the httpd.xml file, located in [installation_directory]\nsc\conf. You also can switch the port after you log on. See the topic Changing the Security Console Web server default settings.
User names and passwords are case-sensitive and non-recoverable.
Logon window
If you are a first-time user and have not yet activated your license, the Security Console displays an activation dialog box. Follow the instructions to enter your product key.
Note: If the Security Console displays a warning that authentication services are unavailable, and your network uses an external authentication source, have your Global Administrator verify that the source is online and correctly configured. See
The first time you log on, you will see the News page, which lists all updates and improvements in the installed system, including new vulnerability checks. If you do not wish to see this page every time you log on after an update, clear the check box for automatically displaying this page after every login. You can view the News page by clicking the News link that appears under the Help icon dropdown. The Help icon can be found near the top right corner of every page of the console interface.
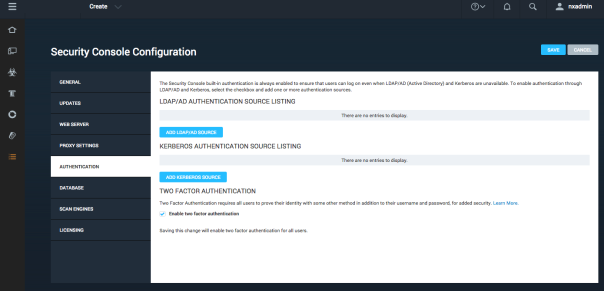
For organizations that want additional security upon login, the product supports Two Factor Authentication. Two Factor Authentication requires the use of a time-based one-time password application such as Google Authenticator.
Two Factor Authentication can only be enabled by a Global Administrator on the Security Console.
To enable Two Factor Authentication:
Note: The Security Console's Two Factor Authentication is not currently compatible with Active Directory (LDAP) and Kerberos authentication methods.
The next step is to generate a token for each user. The users can generate their own tokens, or you can generate tokens for them that they then change. In either case, you should communicate with them about the upcoming changes.
Once Two Factor Authentication is enabled, when a user logs on, they will see a field where they can enter an access code. For the first time, they should log in without specifying an access code.
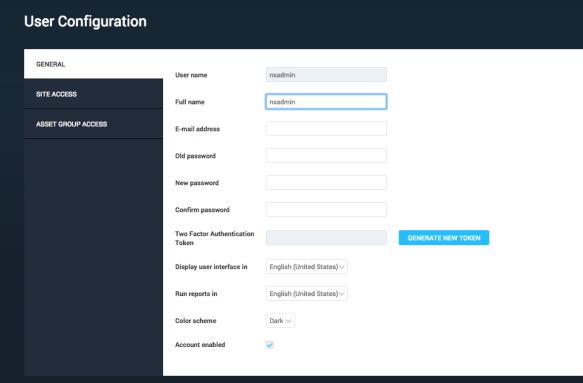
Once the user logs in, they can generate a token in the User Preferences page.
The user should then open their time-based one-time password application such as Google Authenticator. They should enter the token as the key in the password application. The password application will then generate a new code that should be used as the user’s access code when logging in.
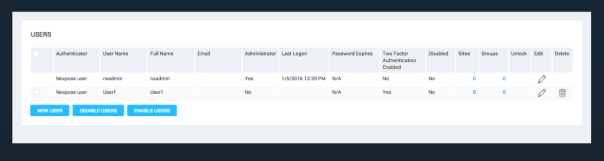
A Global Administrator can check whether users have completed the Two Factor Authentication on the Manage Users page. The Manage Users page can be reached by going to the Administration tab and clicking the Manage link in the Users section. A new field, Two Factor Authentication Enabled, will appear in the table and let the administrator know which users have enabled this feature.
If the user doesn’t create a token, they will still be able to log in without an access code. In this case, you may need to take steps to enforce enablement.
You can enforce that all users log in with a token by disabling the accounts of any users who have not completed the process, or by creating tokens for them and emailing them their tokens.
To disable users:
To generate a token for a user:
The Security Console includes a Web-based user interface for configuring and operating the application. Familiarizing yourself with the interface will help you to find and use its features quickly.
When you log on to the to the Home page for the first time, you see place holders for information, but no information in them. After installation, the only information in the database is the account of the default Global Administrator and the product license.
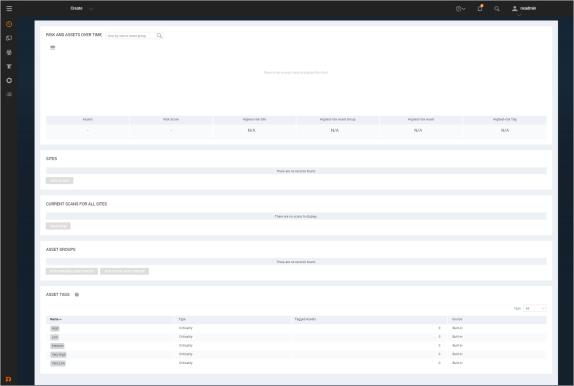
The Home page as it appears in a new installation
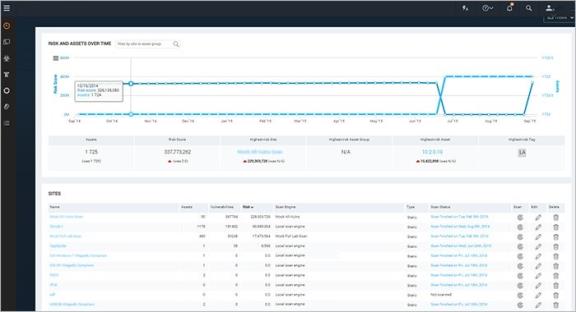
The Home page as it appears with scan data
The Home page shows sites, asset groups, tickets, and statistics about your network that are based on scan data. If you are a Global Administrator, you can view and edit site and asset group information, and run scans for your entire network on this page.
The Home page also displays a chart that shows trends of risk score and number of assets over time. The growth in assets over time is an increase in your surface area (total number of assets). As you add assets to your environment your level of risk can increase because the more assets you have, the more potential there is for vulnerabilities.
Each point of data on the chart represents a week. The darker blue line and measurements on the left show how much your risk score has increased or decreased over time. The lighter blue line displays the number of assets.
Note: This interactive chart shows a default of a year’s worth of data when available; if you have been using the application for a shorter historical period, the chart will adjust to show only the months applicable.
The following are some additional ways to interact with charts:
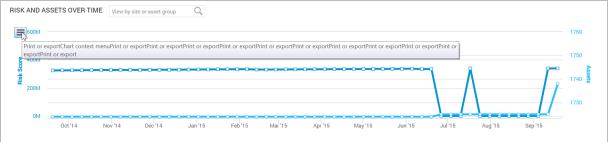
Print or export the chart from the sidebar menu
On the Site Listing pane, you can click controls to view and edit site information, run scans, and start to create a new site, depending on your role and permissions.
Information for any currently running scan appears in the pane labeled Current Scan Listings for All Sites.
On the Ticket Listing pane, you can click controls to view information about tickets and assets for which those tickets are assigned.
On the Asset Group Listing pane, you can click controls to view and edit information about asset groups, and start to create a new asset group.
A menu appears on the left side of the Home page, as well as every page of the Security Console. Mouse over the icons to see their labels, and use these icons to navigate to the main pages for each area.
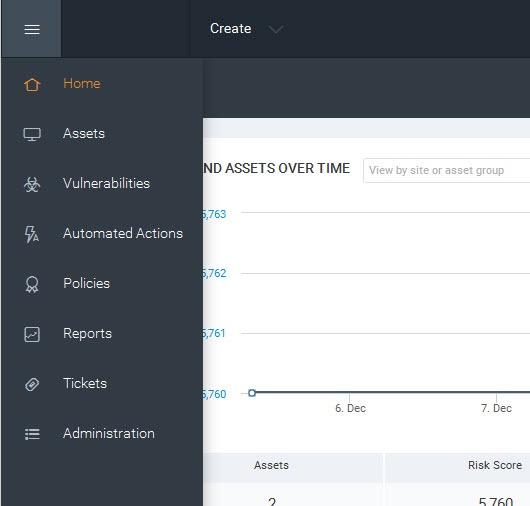
Icon menu
The Home page links to the initial page you land on in the Security Console.
The Assets page links to pages for viewing assets organized by different groupings, such as the sites they belong to or the operating systems running on them.
The Vulnerabilities page lists all discovered vulnerabilities.
The Policies page lists policy compliance results for all assets that have been tested for compliance.
The Reports page lists all generated reports and provides controls for editing and creating report templates.
The Tickets page lists remediation tickets and their status.
The Administration page is the starting point for all management activities, such as creating and editing user accounts, asset groups, and scan and report templates. Only Global Administrators see this icon.
Some features of the application are supported in multiple languages. You have the option to set your user preferences to view Help in the language of your choosing. You can also run Reports in multiple languages, giving you the ability to share your security data across multi-lingual teams.
To select your language, click your user name in the upper-right corner and select User Preferences. This will take you to the User Configuration panel. Here you can select your language for Help and Reports from the corresponding drop down lists.
When selecting a language for Help, be sure to clear your cache and refresh your browser after setting the language to view Help in your selection.
Setting your report language from the User Configuration panel will determine the default language of any new reports generated through the Create Report Configuration panel. Report configurations that you have created prior to changing the language in the user preferences will remain in their original language. When creating a new report, you can also change the selected language by going to the Advanced Settings section of the Create a report page. See the topic
Throughout the Web interface, you can use various controls for navigation and administration.
| Control | Description | Control | Description |
|---|---|---|---|
 |
Minimize any pane so that only its title bar appears. |

|
Add items to your dashboard. |

|
Expand a minimized pane. |

|
Copy a built-in report template to create a customized version. |

|
Close a pane. |

|
Edit properties for a site, report, or a user account. |

|
Click to display a list of closed panes and open any of the listed panes. |

|
View a preview of a report template. |

|
Export data to a comma-separated value (CSV) file. |
|
Delete a site, report, or user account. |

|
Start a manual scan. |

|
Exclude a vulnerability from a report. |

|
Pause a scan. |

|
View Help. View the Support page to search FAQ pages and contact Technical Support. View the News page which lists all updates. |

|
Resume a scan. | Product logo | Click the product logo in the upper-left area to return to the Home page. |

|
Stop a scan. | User: <user name> link | This link is the logged-on user name. Click it to open the User Configuration panel where you can edit account information such as the password and view site and asset group access. Only Global Administrators can change roles and permissions. |

|
Initiate a filtered search for assets to create a dynamic asset group. | Log Out link | Log out of the Security Console interface. The Logon box appears. For security reasons, the Security Console automatically logs out a user who has been inactive for 10 minutes. |
|
Expand a drop-down list of options to create sites, asset groups, tags, or reports. |
With the powerful full-text search feature, you can search the database using a variety of criteria, such as the following:
Access the Search box on any a page of the Security Console interface by clicking the magnifying glass icon near the top right of the page.
![]()
Clicking the Search icon
Enter your search criteria into the Search box and then click the magnifying glass icon again. For example, if you want to search for discovered instances of the vulnerabilities that affect assets running ActiveX, enter ActiveX or activex in the Search text box. The search is not case-sensitive.

Starting a search
The application displays search results on the Search page, which includes panes for different groupings of results. With the current example,
ActiveX, results appear in the Vulnerability Results table. At the bottom of each category pane, you can view the total number of results and change settings for how results are displayed.
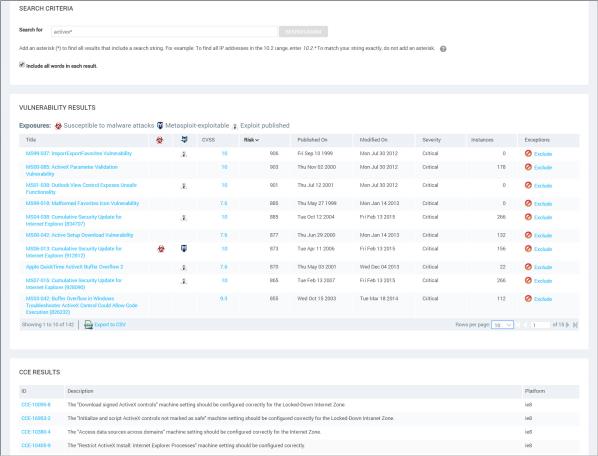
Search results
In the Search Criteria pane, you can refine and repeat the search. You can change the search phrase and choose whether to allow partial word matches and to specify that all words in the phrase appear in each result. After refining the criteria, click the Search Again button.
When you run initial searches with partial strings in the Search box that appears in the upper-right corner of most pages in the Web interface, results include all terms that even partially match those strings. It is not necessary to use an asterisk (*) on the initial search. For example, you can enter Win to return results that include the word Windows, such as any Windows operating system. Or if you want to find all IP addresses in the 10.20 range, you can enter 10.20 in the Search text box.
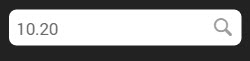
If you want to modify the search after viewing the results, an asterisk is appended to the string in the Search Criteria pane that appears with the results. If you leave the asterisk in, the modified search will still return partial matches. You can remove the asterisk if you want the next set of results to match the string exactly.
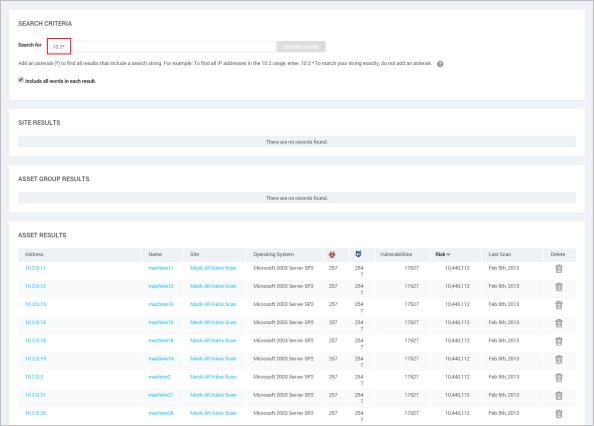
Searching with a partial string
If you precede a string with an asterisk, the search ignores the asterisk and returns results that match the string itself.
Certain words and individual characters, collectively known as stop words return no results, even if you enter them with asterisks. For better performance, search mechanisms do not recognize stop words. Some stop words are single letters, such as a, i, s, and t. If you want to include one of these letters in a search string, add one or more letters to the string. Following is a list of stop words:
| a | about | above | after | again | against | all | am | an | and |
| any | are | as | at | be | because | been | being | below | before |
| between | both | but | by | can | did | do | doing | don | does |
| down | during | each | few | for | from | further | had | has | have |
| having | he | her | here | hers | herself | him | himself | his | how |
| i | if | in | into | it | is | its | itself | just | me |
| more | most | my | myself | no | nor | not | now | of | off |
| on | once | only | or | other | our | ours | ourselves | out | over |
| own | s | same | she | should | so | some | such | t | than |
| that | the | their | theirs | them | themselves | then | there | these | they |
| this | those | through | to | too | under | until | up | very | was |
| we | were | what | when | where | which | while | who | whom | why |
| will | with | you | your | yours | yourself | yourselves |
You can access a number of key Security Console operations quickly from the Administration page. To go there, click the Administration icon. The page displays a panel of tiles that contain links to pages where you can perform any of the following operations to which you have access:
Tiles that contain operations that you do not have access to because of your role or license display a label that indicates this restriction.
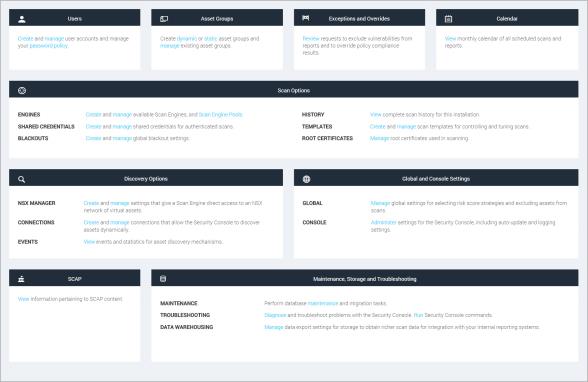
Administration page
After viewing the options, select an operation by clicking the link for that operation.
The Security Console provides panels for configuration and administration tasks:
Note: Parameters labeled in red denote required parameters on all panel pages.
Note: You can change the length of the Web interface session. See
By default, an idle Web interface session times out after 10 minutes. When an idle session expires, the Security Console displays a logon window. To continue the session, simply log on again. You will not lose any unsaved work, such as configuration changes. However, if you choose to log out, you will lose unsaved work.
If a communication issue between your browser and the Security Console Web server prevents the session from refreshing, you will see an error message. If you have unsaved work, do not leave the page, refresh the page, or close the browser. Contact your Global Administrator.